Easy Origami Olive Branch: Step-by-Step Paper Craft
How to Make an Origami Olive Branch is a delightful project that brings a touch of nature and peace right to your fingertips! Imagine a slender, graceful stem adorned with perfectly folded leaves, looking so realistic you might almost smell the Mediterranean air. This easy origami model is ideal for complete beginners, kids looking for a fun craft, or anyone wanting to create charming decorations or small, thoughtful gifts. In about 15-20 minutes, you’ll learn simple yet effective folding techniques to bring this beautiful symbol to life. Get ready to discover the joy of transforming a flat piece of paper into a lovely, symbolic branch!
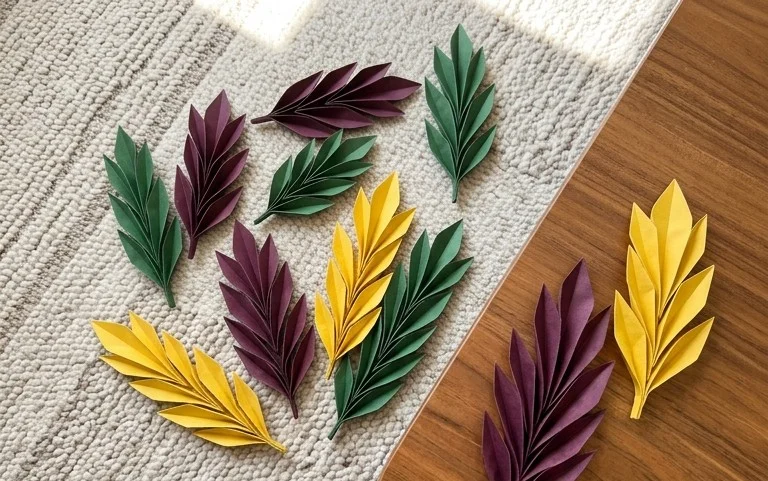
Let’s get started on crafting a beautiful origami olive branch! It’s a wonderfully symbolic and surprisingly straightforward model, perfect for adding a touch of nature to your creations or for a thoughtful handmade gift. I’ll guide you through every step, ensuring even if you’re new to origami, you’ll end up with a lovely branch.
Choosing Your Paper: The Foundation of Your Olive Branch
The paper you choose is crucial for a successful origami olive branch. For this model, I highly recommend using standard origami paper.
Type and Weight:
Origami paper is specifically designed to hold creases well and be thin enough for multiple folds. It’s usually made from kozo or sulphite pulp. The typical weight is around 60-75 gsm (grams per square meter), which is ideal. If you use thicker paper, like cardstock, it will become very difficult to fold, especially in the later stages. Too thin paper, like tissue paper, might tear too easily.
Size:
A good starting size for your olive branch is a 15cm x 15cm (or 6 inch x 6 inch) square. This size is manageable for beginners and allows the details of the olive branch to emerge nicely. You can absolutely experiment with larger or smaller squares once you’re comfortable.
Single or Double-Sided:
For an olive branch, I prefer to use single-sided paper. This means one side is coloured (usually green for our branch) and the other side is white. This allows the white side to show through on the underside of the leaves, creating a subtle contrast that enhances the natural look of the branch. If you only have double-sided paper, don’t worry! It will still look lovely, just with colour on both sides of the leaves.
Understanding the Base Folds: Your Building Blocks
Before we dive into the specific sequence for the olive branch, let’s familiarize ourselves with a couple of fundamental origami folds that are essential here. Making these folds precisely and crisply will make the entire process much smoother.
The Valley Fold:
This is the most basic fold. Imagine folding the paper towards you, creating a “valley” in the middle. You bring one edge or corner to meet another edge or corner, and then crease firmly along the line where they meet.
The Mountain Fold:
This is the opposite of a valley fold. You fold the paper away from you, creating a “mountain ridge.” Again, you bring edges or corners together and crease, but this time you push the fold outwards.
Making Clean Folds:
The key to clean folds is precision and a firm crease.
* Always align edges and corners as accurately as possible before making a crease. Even a millimeter off can make a difference in later steps.
* Use your fingernail or a bone folder (if you have one) to run along the crease line. This makes the fold sharp and defined, which is important for complex models.
* Unfold the paper after making a crease unless the instructions specifically tell you to keep it folded. Many folds in origami are “pre-creases” – they establish lines that you’ll use later.
The Origami Olive Branch: A Step-by-Step Walkthrough
Now, let’s begin the folding process! I’ll describe each step clearly, assuming you have a square of origami paper with the coloured side facing up.
1. Start with your coloured paper facing up. Fold the paper in half diagonally, bringing the bottom right corner up to meet the top left corner. Crease firmly and then unfold. You should now have a diagonal crease running from the bottom left to the top right.
2. Now, fold the paper in half diagonally the other way, bringing the bottom left corner up to meet the top right corner. Crease firmly and then unfold. You now have an “X” shaped set of creases on your paper.
3. Flip the paper over so the white side is facing up.
4. Fold the paper in half horizontally, bringing the bottom edge up to meet the top edge. Crease firmly and then unfold.
5. Fold the paper in half vertically, bringing the left edge over to meet the right edge. Crease firmly and then unfold. You now have a plus sign (+) of creases on the white side.
6. Now we’ll collapse this into a preliminary base. This might sound tricky, but if you follow closely, it’s quite simple! Hold the paper by the left and right edges, with the white side still facing you. Gently push the left and right edges inwards towards the centre. As you do this, the top edge will naturally come down. Your goal is to collapse the paper so that the two side flaps fold inwards along the existing creases, and the top point comes down to meet the bottom point, forming a square shape with four flaps. This is called the preliminary base.
7. Turn the square so that the open end (where the four flaps meet) is pointing towards you.
8. Take the top layer of the right flap and fold its bottom edge inwards to meet the centre vertical crease. Crease firmly.
9. Repeat step 8 with the top layer of the left flap. Fold its bottom edge inwards to meet the centre vertical crease. Crease firmly. You should now have a kite shape on the top layer.
10. Now, take the very top triangular flap that you just folded the sides inwards on. Fold this small triangle downwards, creasing it along the top edge of the flaps you just made. Crease firmly and then unfold this small triangle. This creates a horizontal crease.
11. Now, you need to “petal fold” this section. This means lifting the entire flap you just worked on, up and outwards, using the horizontal crease you made in step 10 as a hinge. As you lift it, the sides that you folded inwards in steps 8 and 9 will naturally want to fold inwards along their existing creases. You’re essentially opening up that kite shape and flattening it into a diamond shape. Press down firmly to create the new creases.
12. Flip the entire model over.
13. You will now see a mirror image of what you just did on the other side. Repeat steps 8 through 11 on this side: Fold the bottom edge of the top right flap to the centre crease, then the bottom edge of the top left flap to the centre crease. Then, fold the small top triangle down, crease, and unfold it. Finally, petal fold the entire flap upwards to create a diamond shape. This is now called the bird base.
14. Orient the bird base so that the two “legs” (the open flaps at the bottom) are pointing downwards.
15. Take the right leg and fold it upwards at an angle, aiming for it to meet the right edge of the model. This will form one of the leaves of your branch. Crease firmly.
16. Repeat step 15 with the left leg, folding it upwards at a similar angle to meet the left edge of the model. Crease firmly. These are the initial leaves.
17. Now, we’ll refine the leaves. Take the right flap you just folded up and fold it slightly backwards, creating a thinner, more elongated leaf shape. You’re essentially making a small fold along the outside edge of that leaf.
18. Repeat step 17 on the left side, folding that flap slightly backwards to refine its shape.
19. At the top of the model, where the points are, you’ll see two flaps. Take the right-hand top flap and fold it downwards, at a slight angle, to create the stem of your olive branch. Crease firmly.
20. Take the left-hand top flap and fold it downwards, mirroring the angle of the right flap. This will be another part of the stem. Crease firmly.
21. Now, you’ll notice that where these two top flaps meet, there’s a point sticking out. This is where we’ll create the final leaves. Take the very tip of the right-hand top flap and fold it slightly upwards and outwards, creating a small, pointed leaf shape.
22. Repeat step 21 with the very tip of the left-hand top flap, creating another small leaf.
23. You can then make further small adjustments by folding the tips of these final leaves or the main leaves slightly to give them a more natural, slightly curved appearance.
Where Beginners Usually Go Wrong (and How to Avoid Them):
* **Inaccurate Preliminary and Bird Base Folds:** The biggest hurdle for beginners is often collapsing the preliminary base and then forming the bird base correctly.
* **How to Avoid:** Be patient! Make sure all your initial diagonal and horizontal/vertical creases are sharp and accurate. When collapsing the preliminary base, gently guide the paper along those creases. Don’t force it. The bird base involves a petal fold, which can be tricky. Focus on using the pre-creases to guide the paper. Watch videos of the preliminary and bird base if you get stuck – sometimes seeing it in action helps immensely.
* **Uneven Leaf Angles:** When you start folding the legs up to create the leaves (steps 15 and 16), it’s easy for them to be at very different angles, making the branch look lopsided.
* **How to Avoid:** Try to visually match the angle of one leg to the other as you fold them up. You can even make a tiny pre-crease on one side and then try to match it on the other. Remember, nature isn’t perfectly symmetrical, so a slight difference is okay, but a drastic one will detract from the model.
* **Over-folding the Refinements:** In steps 17, 18, 21, and 22, we make small folds to refine the leaf shapes. It’s easy to get carried away and make these folds too large, which can make the leaves look chunky or unnatural.
* **How to Avoid:** Think “subtle” and “small.” These are just meant to add a bit of dimension and a more natural curve. A fold of only a millimeter or two is often enough. It’s better to make a small fold and see if you like it, then adjust, than to make a big fold you can’t easily undo.
Varying Your Origami Olive Branch: Personalize Your Creation
Once you’ve mastered the basic olive branch, you can have a lot of fun with variations!
Size:
As mentioned earlier, you can use larger or smaller squares of paper. A larger square will result in a more prominent branch, while a smaller square is perfect for adding to intricate cards or miniatures. Just be aware that smaller folds require more precision.
Paper Pattern:
While green is traditional, don’t be afraid to experiment!
* **Patterned origami paper:** Look for papers with subtle textures or very light patterns. A paper with a faint watercolor wash or a subtle speckled pattern could add a unique artistic touch without being overwhelming.
* **Metallic or pearlescent paper:** These can give your olive branch a more elegant and sophisticated feel.
* **Paper with a natural texture:** Some papers have a linen-like or handmade feel. These can enhance the organic quality of the branch.
Colour:
Green is classic, but you can explore other colour palettes.
* **Muted greens and olives:** These will give a more realistic, natural look.
* **Lighter greens or even yellows:** For a springtime or more vibrant feel.
* **A touch of brown:** You could even try using a very light brown paper to represent a more aged or autumnal branch, or for a different kind of leaf.
Displaying and Gifting Your Origami Olive Branch
Your finished olive branch is a beautiful little piece of art, and there are many lovely ways to showcase or gift it.
Display Ideas:
* **In a shadow box:** Arrange a few olive branches together in a shadow box for a striking wall art piece. You can add a small label or even a tiny origami olive.
* **As a bookmark:** The shape of the olive branch makes it a perfect, elegant bookmark.
* **In a miniature vase:** Place a single branch or a small cluster in a tiny decorative vase.
* **As part of a larger scene:** If you enjoy creating dioramas or miniature landscapes, an origami olive branch can add a wonderful natural element.
Gifting Ideas:
* **On a handmade card:** Fold a small olive branch and attach it to a greeting card for birthdays, anniversaries, or just because. It adds a beautiful handmade touch.
* **As a wedding favor or embellishment:** For a wedding with a rustic or Mediterranean theme, small olive branches can be a lovely detail on place cards or as part of a favor bag.
* **Tied to a gift:** Use it as a decorative element tied to the ribbon of a gift.
* **In a small gift box:** Present a single, perfectly folded olive branch in a small jewelry box for a delicate and thoughtful present.
I hope you’ve enjoyed learning to make your origami olive branch! Remember, the most important thing in origami is to enjoy the process, be patient with yourself, and have fun creating. Happy folding!
Conclusion
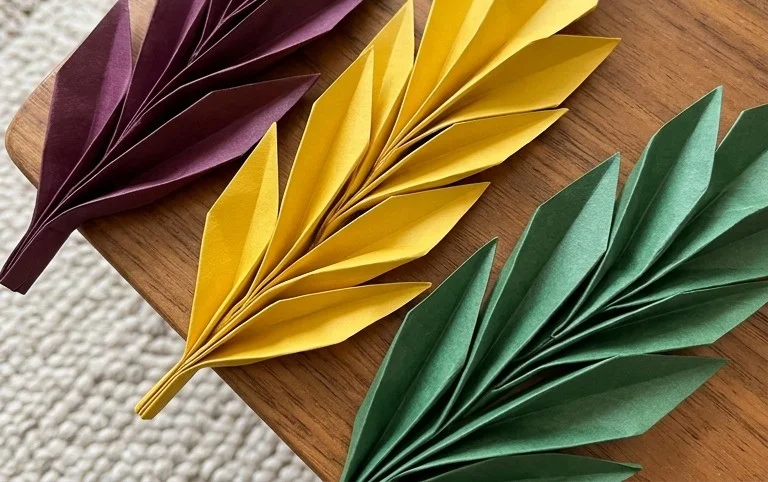
Congratulations on completing your origami olive branch! We hope you enjoyed this simple yet elegant paper craft. Don’t worry if your first olive branch isn’t perfect; every fold is a step towards mastery, and practice makes all the difference. Share your beautiful creation with friends or family – it’s a lovely symbol of peace and a wonderful handmade gift.
Ready for more? Try folding a second olive branch with a slightly different colored paper, or experiment with different paper weights for a unique texture. You can even try making a whole bouquet!
We encourage you to continue exploring the wonderful world of origami. There are countless other paper projects waiting for you to discover!
