Easy Origami Gift Box: Stable DIY Pro Tutorial
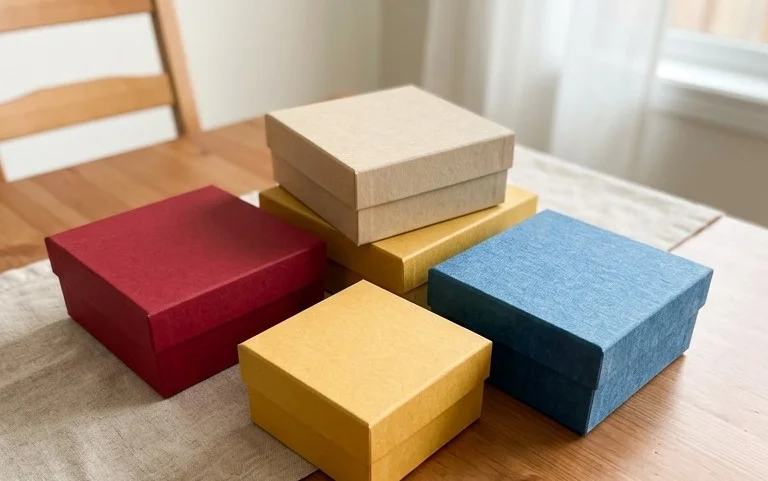
Stabile Geschenkboxen selber bauen – das klingt vielleicht nach viel Aufwand, aber ich zeige dir heute, wie einfach und genial das mit Papier sein kann! Stell dir vor, du faltest im Handumdrehen eine wunderschöne, solide Box, die perfekt ist, um kleine Kostbarkeiten, selbstgemachte Leckereien oder ein besonderes Geschenk darin zu überreichen. Diese Box ist kein zartes Origami-Modell, sondern wirklich stabil – ideal für jeden Anlass.
Ganz egal, ob du ein absoluter Anfänger bist, nach einer tollen Bastelidee mit Kindern suchst oder einfach nur liebevoll gestaltete Geschenke machen möchtest, diese Anleitung ist genau das Richtige für dich. Mit nur wenigen Handgriffen und etwa 15-20 Minuten Zeit zauberst du ein echtes Unikat. Wir lernen Schritt für Schritt, wie wir aus einem einfachen Blatt Papier eine perfekte, standfeste Box formen, die garantiert für strahlende Augen sorgt!
Stabile Geschenkboxen selber bauen: Die Profi-Anleitung für zu Hause
Hello there, fellow crafters! I’m so excited to guide you through the wonderful world of origami to create your very own stable and beautiful gift boxes. Forget those flimsy store-bought options; a handmade origami box is a thoughtful and impressive way to present any gift. This tutorial is designed for beginners, and I promise, with a little patience and practice, you’ll be creating stunning boxes in no time. We’ll go through everything step-by-step, from choosing the right paper to avoiding common pitfalls. Let’s get started on making something special!
Choosing Your Paper: The Foundation of a Great Box
The paper you choose is crucial for the success of your origami box. It needs to be sturdy enough to hold its shape but also easy to fold crisply.
Type and Weight:
For this project, I recommend using standard origami paper. This paper is specifically designed for folding and has a good balance of strength and flexibility. It’s typically coloured on one side and white on the other, or it can be patterned. If you can’t find origami paper, good quality thicker printer paper (around 90-100 gsm) can work, but it might be a bit stiffer to fold. Avoid very thin paper, like tissue paper, as it won’t be stable enough for a box. Cardstock is generally too thick for complex origami, but for a simpler box design, very thin cardstock might be an option, though it will be challenging to get sharp creases.
Size:
The size of your paper will directly determine the size of your box. For practice, I suggest starting with a square piece of paper that is at least 15cm x 15cm (6 inches x 6 inches). This size is manageable for beginners and allows you to see the folds clearly. As you get more comfortable, you can experiment with larger sizes, like 20cm x 20cm (8 inches x 8 inches) or even larger for bigger gifts. Remember, the finished box will be smaller than your starting paper size.
Single or Double-Sided:
For this particular box design, I find using single-sided coloured origami paper to be the most visually appealing. This way, the inside of your box will be white (or the reverse colour), creating a nice contrast with the outer colour. However, double-sided coloured paper can also look fantastic, giving your box a uniform colour inside and out. If you have patterned paper, consider how the pattern will look on the inside and outside. Sometimes, a subtle pattern on the outside and a solid colour on the inside works beautifully.
The Base Folds: Mastering the Fundamentals
Before we dive into the box construction, let’s get comfortable with a few fundamental origami folds. Making clean, precise creases is the key to professional-looking results.
The Valley Fold:
This is the most basic fold. Imagine folding the paper towards you, creating a “valley” in the middle. To make a clean valley fold, align the edges or corners very precisely, hold them firmly, and then run your fingernail or a bone folder along the crease.
The Mountain Fold:
This is the opposite of a valley fold. You fold the paper away from you, creating a “mountain” ridge. For a clean mountain fold, you often start with a valley fold, then unfold, and then push the paper up along the valley crease to create the mountain. Again, precise alignment and a firm crease are essential.
The Preliminary Fold (Square Base):
This is a foundational fold for many origami models, including our box.
1. Start with your square paper, coloured side up (if using single-sided paper).
2. Fold the paper in half diagonally, bringing the bottom right corner up to meet the top left corner. Crease well. Unfold.
3. Now fold the paper in half along the other diagonal, bringing the bottom left corner up to meet the top right corner. Crease well. Unfold. You should have an “X” crease on your paper.
4. Flip the paper over so the white side is facing up.
5. Fold the paper in half horizontally, bringing the bottom edge up to meet the top edge. Crease well. Unfold.
6. Fold the paper in half vertically, bringing the left edge over to meet the right edge. Crease well. Unfold. You should now have a “+” crease on the white side and an “X” crease on the coloured side.
7. Now, gently push the left and right edges of the paper inwards along the horizontal crease. As you do this, the top and bottom edges will naturally come together. Flatten the model down into a square. This is your preliminary base, also known as a square base.
Step-by-Step Box Construction: Your Origami Journey Begins
Now that you’re comfortable with the basic folds, let’s build our stable gift box! I’ll guide you through each step clearly.
1. Begin with your preliminary base (square base) flat on the table, with the open end pointing towards you. The coloured side should be facing upwards.
2. Take the top layer of the front flap only. Fold the bottom point of this flap up to meet the very top point of the square base. Crease firmly.
3. Now, take the right edge of this same top layer front flap and fold it inwards to meet the vertical centre crease. Crease firmly.
4. Repeat step 3 with the left edge of the same top layer front flap, folding it inwards to meet the vertical centre crease. Crease firmly. You should now have a kite shape on the top front flap.
5. Unfold the folds you just made in steps 3 and 4. You’ll see crease lines forming a diamond shape on that top front flap.
6. Now, open up the flap you were just working on (the one you folded the point up on in step 2). You should see the creases you made. Carefully lift the bottom point of that flap upwards. Using the creases you just made, flatten the sides inwards. This is called a petal fold. The two side edges should now meet in the centre, and the point should be at the top. You’ve essentially turned a kite into a diamond shape.
7. Flip the entire model over.
8. Repeat steps 2 through 6 on this side. Fold the bottom point of the top layer up to meet the top point, then fold the right and left edges to the centre crease, unfold those two side folds, and then perform the petal fold by lifting the bottom point up and flattening the sides inwards. You should now have a shape that looks like a narrow diamond with two flaps on each side.
9. Take the top layer of the right flap. Fold the right edge of this flap inwards to meet the vertical centre crease. Crease firmly.
10. Repeat step 9 with the top layer of the left flap, folding the left edge inwards to meet the vertical centre crease. Crease firmly. The front of your model should now look like a long, thin diamond.
11. Flip the model over.
12. Repeat steps 9 and 10 on this side. Fold the right edge of the top right flap to the centre crease, and then the left edge of the top left flap to the centre crease.
13. Now, we’re going to form the box itself. Take the entire right half of the model and fold it over to the left, aligning the right edge with the vertical centre crease. Crease firmly.
14. Flip the model over.
15. Repeat step 13 on this side. Fold the right half over to the left, aligning the right edge with the vertical centre crease. Crease firmly. You now have a long, narrow rectangular shape.
16. This is where the box starts to take shape. Look at the open end where the flaps are. Gently pull the two side panels outwards. As you pull them apart, the bottom of the model will naturally start to form a base.
17. Continue to gently open the sides, using your fingers to guide the creases and form the walls of the box. You’ll be creating four sides and a bottom. Push down firmly on the base to ensure it’s flat and stable.
18. To secure the lid and base, you’ll notice little triangular flaps that are now on the inside of the box walls. Fold these flaps inwards and tuck them neatly into the opposite side’s pocket. This is what makes the box stable! You’ll have two on each side. Fold them down and tuck them into the pocket created by the adjacent panel. This takes a little fiddling, but it’s worth it for a sturdy box.
Congratulations! You’ve just created a stable origami gift box!
Common Pitfalls and How to Avoid Them
Even with the best intentions, beginners sometimes encounter a few tricky spots. Here are some common mistakes and how to steer clear of them:
* **Soft Creases:** This is the most common issue. If your creases aren’t sharp, your box won’t hold its shape.
* **Solution:** Don’t be afraid to press firmly! Use your fingernail, the edge of a ruler, or a bone folder to really impress the crease into the paper. Make sure you are aligning edges and corners perfectly before you crease. Take your time on each fold.
* **Misaligned Corners/Edges:** Even a small misalignment can throw off the entire structure.
* **Solution:** Before you make any crease, take a moment to ensure everything is perfectly aligned. Line up corners with corners and edges with edges. If it doesn’t look quite right, unfold and re-align. Precision is key in origami.
* **Struggling with the Petal Fold:** This can be confusing for beginners as it involves manipulating the paper in a specific way.
* **Solution:** Refer back to step 6 and 8. Imagine you are “opening up” the flap and then using the existing creases as guides to fold the sides inwards. It’s like turning a kite shape into a diamond by pushing the centre upwards. Go slowly, and don’t force the paper. If it feels like it’s tearing, you might be pushing too hard or the paper is too thick.
* **The Final Tuck-in:** Getting those inner flaps tucked in neatly can be fiddly.
* **Solution:** Gently guide the flaps into the pockets. Sometimes, slightly adjusting the angle of the side panels can help create a clearer opening for the tuck. Don’t be afraid to use your fingers to gently push and maneuver the paper into place.
Varying Your Creations: Endless Possibilities
The beauty of origami is its versatility! You can easily adapt this box design to suit your needs and style.
* **Size:** As mentioned earlier, simply start with a larger or smaller square piece of paper. The proportions of the box will remain the same, just scaled up or down. For a truly precise box where the lid fits snugly, you might want to cut the lid paper slightly larger than the base paper. For this model, however, if you make the base and lid from the same size square, they will fit together well.
* **Paper Pattern and Colour:** This is where you can truly get creative!
* **Patterned Paper:** Use papers with geometric designs, floral motifs, or even cute characters. Consider the occasion – a festive pattern for holidays, a sophisticated pattern for elegant gifts.
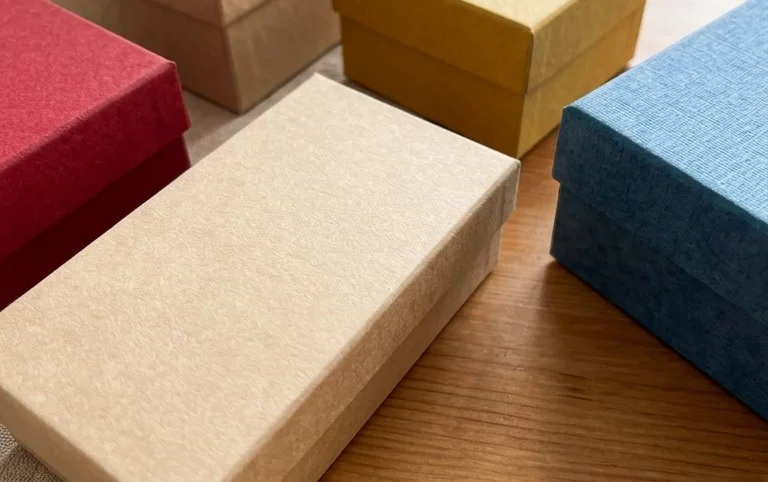
* **Solid Colours:** Mix and match colours! Make a coloured box with a contrasting coloured interior, or use two different coloured papers to make the base and the lid.
* **Metallic or Pearlescent Papers:** These add a touch of luxury and shine.
* **Washi Tape or Stickers:** Once your box is folded, you can further embellish it with decorative tape or stickers.
Ideas for Displaying or Gifting Your Finished Model
Your beautifully folded origami box is more than just a container; it’s a gift in itself!
* **Gifts:**
* **Jewellery:** Perfect for earrings, necklaces, or rings.
* **Chocolates or Small Treats:** A sweet surprise inside a sweet box.
* **Craft Supplies:** Tiny beads, buttons, or a special needle.
* **Handwritten Notes or Letters:** A classic and personal touch.
* **Gift Cards:** Elevate a simple gift card with a handmade presentation.
* **Display:**
* **Desk Organizer:** Use smaller boxes to hold paperclips, erasers, or other small office supplies.
* **Decorative Storage:** Stack or arrange several boxes on a shelf to hold trinkets, mementos, or dried flowers.
* **Part of a Larger Display:** Incorporate your boxes into a tabletop display for parties or events.
I hope you’ve enjoyed this detailed guide to creating your own stable origami gift boxes. Remember, practice makes perfect, so don’t get discouraged if your first few attempts aren’t flawless. The joy is in the process and the beautiful, handmade results. Happy folding!
Conclusion
Congratulations on mastering the art of creating your own stabile Geschenkboxen! We hope you enjoyed this guide and feel inspired to fold. Don’t worry if your first attempt isn’t perfect; every fold is a step towards mastery. Share your beautiful creations with friends and family – they’re sure to be impressed! For your next project, why not try a slightly larger box, or perhaps a lid with a contrasting color? The possibilities with paper are endless. We invite you to explore more of our paper craft adventures and discover even more delightful projects to bring to life.