Easy Carambola Flower Origami: Step-by-Step Paper Craft
Carambola flowers are such a delightful project to fold, and today I’m so excited to guide you through making your own! Imagine a beautiful, star-shaped bloom, with delicate petals unfurling from a central point. It’s a stunning and unique model that looks surprisingly complex but is actually quite accessible. This tutorial is perfect for complete beginners and kids who are ready for a fun papercraft challenge. You can expect to create your first carambola flower in about 10-15 minutes. We’ll be working with simple, fundamental origami folds, learning how to transform a single square of paper into this intricate, architectural beauty. Get your paper ready – let’s start folding this gorgeous blossom together!
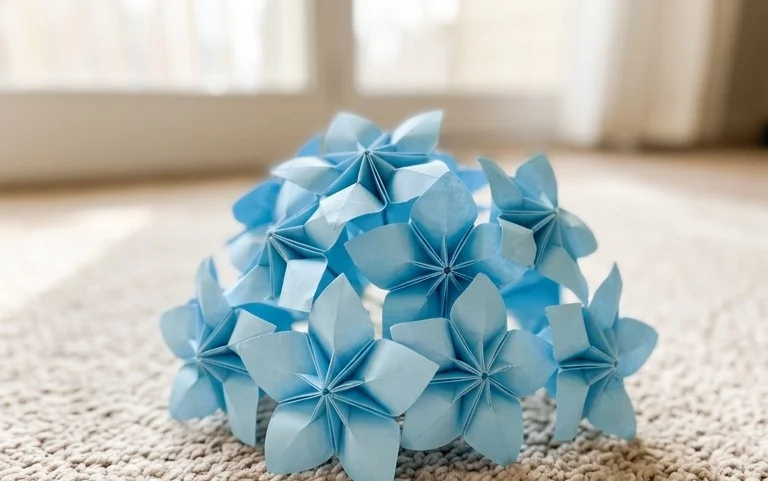
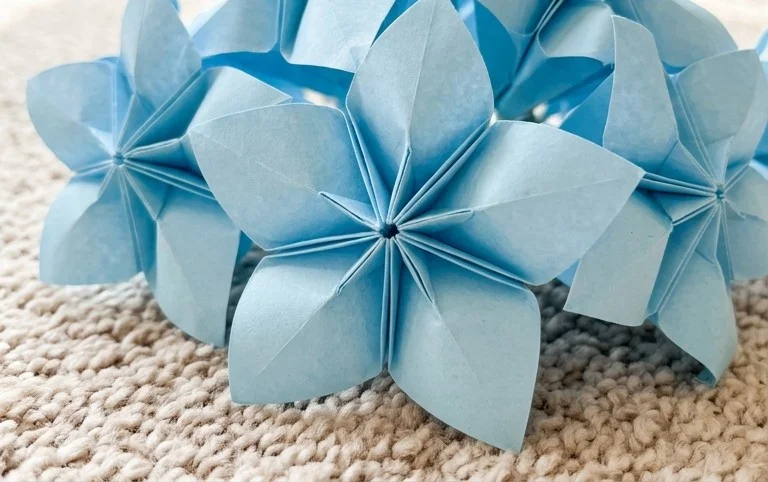
Let’s make some beautiful Carambola Flowers! These are a delightful origami creation, and while they might look a little intricate, I promise they’re quite achievable for beginners once you get the hang of them. They’re named for their star-like shape, reminiscent of the carambola fruit, also known as star fruit. I find them incredibly satisfying to fold, and the finished product is always a lovely surprise.
Choosing Your Paper
The paper you choose will have a big impact on how your Carambola Flower looks and feels. For this model, I generally recommend using standard origami paper.
Type and Weight
Origami paper is ideal because it’s designed to hold crisp folds and is usually not too thick. You can also use printer paper, but it will be a bit stiffer and the finished flower might not have as much dimension. Avoid cardstock or anything too heavy, as it will make it difficult to achieve the finer folds. A good weight to aim for is around 70-90 gsm (grams per square meter). This gives you a nice balance of sturdiness and pliability.
Size
For your first few attempts, I’d suggest starting with a square piece of paper that’s around 15 cm (6 inches) per side. This size is manageable for learning the steps without being so small that the folds become fiddly. Once you’re comfortable, you can experiment with larger or smaller squares to create different-sized flowers.
Single or Double-Sided Paper
This is where you can really play with the aesthetics! For a classic Carambola Flower, using single-sided origami paper is perfect. This way, the colored side will form the petals, and the white side will be hidden on the inside. However, don’t be afraid to use double-sided paper! If you choose paper that’s two different colors, you’ll get a really interesting two-toned effect on your petals, which can be quite striking. For this tutorial, let’s assume we’re using single-sided paper, with the colored side facing up at the beginning.
Essential Base Folds for Clean Folds
Before we dive into the Carambola Flower itself, let’s make sure we’re comfortable with a couple of fundamental folds that are crucial for clean origami.
The first is the valley fold. This is when you fold a piece of paper in half, bringing two edges or corners together, so that the crease forms a “valley” on the side you’re looking at. The key to a clean valley fold is to align the edges or corners as precisely as possible before you make the crease. Once aligned, run your fingernail or a bone folder firmly along the fold line, starting from the center and working outwards. This will create a sharp, defined crease.
The second is the mountain fold. This is the opposite of a valley fold. You’ll fold the paper so that the crease appears as a “mountain” ridge on the side you’re looking at. Again, precision in alignment is key. For a mountain fold, you might find it helpful to first make a valley fold along the desired line, then unfold, and then fold in the opposite direction along that same crease. This reinforces the crease and makes it easier to execute a clean mountain fold.
Always unfold after making a crease unless the next step specifically tells you to keep it folded. For the Carambola Flower, we’ll be making many creases that we’ll then use as guides.
Folding the Carambola Flower: A Step-by-Step Guide
Let’s get started! Lay your square of paper flat in front of you with the colored side facing up.
1. Begin by folding the paper in half diagonally, bringing the bottom-left corner up to meet the top-right corner. Make a sharp crease. Unfold the paper.
2. Now, fold the paper in half diagonally again, bringing the bottom-right corner up to meet the top-left corner. Make a sharp crease. Unfold the paper. You should now have two diagonal creases forming an ‘X’ on your paper.
3. Flip the paper over so the white side is facing up.
4. Fold the paper in half horizontally, bringing the bottom edge up to meet the top edge. Make a sharp crease. Unfold the paper.
5. Fold the paper in half vertically, bringing the left edge over to meet the right edge. Make a sharp crease. Unfold the paper. You should now have horizontal and vertical creases, forming a grid.
6. With the white side still facing up, bring all four corners to meet at the center of the paper. You will naturally create diagonal creases. Flatten the model. You should now have a smaller square. This is our preliminary base.
7. Now, with the colored side of this smaller square facing up, take one of the flaps (there are four of them) and fold its bottom edge up to meet the horizontal center crease. Crease firmly.
8. Repeat step 7 for the remaining three flaps, folding their bottom edges up to the center crease. You will now have a shape that looks like an envelope with flaps folded inwards.
9. Flip the entire model over.
10. Take one of the pointed tips that is now facing you and fold it upwards along the center vertical crease. The tip should meet the horizontal center crease at the top. Crease firmly.
11. Repeat step 10 for the other three pointed tips, folding them upwards to the top center crease. Your model will now look like a diamond with four points sticking up.
12. Now, we need to prepare for the petals. Take one of the side flaps (the ones that were originally the edges of the preliminary base, now folded inwards in step 7 and 8). You’ll see a small flap sticking out. Fold this small flap outwards, so it runs along the edge of the diamond shape you just created in step 10 and 11. Crease it firmly.
13. Repeat step 12 for the remaining three side flaps, folding them outwards to align with the edges.
14. With the model still as it is, take one of the pointed tips at the top (these will become your petals). Gently pull this tip downwards and outwards. As you pull it, you’ll notice the paper wants to open up. You’re essentially creating a petal shape. The crease will form naturally along the edge you created in step 12. Aim to make this fold so that the point of the petal is slightly rounded, like a natural flower petal. Crease gently to hold the shape.
15. Repeat step 14 for the other three pointed tips, pulling them downwards and outwards to form the remaining petals. Be patient with this step; it’s where the flower really starts to take shape.
16. Gently open up the center of the flower to give it some dimension. You can slightly curl the edges of the petals if you like, for a more realistic look.
And there you have it – your beautiful Carambola Flower!
Common Beginner Pitfalls and How to Avoid Them
It’s completely normal to encounter a few snags when you’re learning a new origami model. Here are a couple of places beginners often go wrong with the Carambola Flower, and how to avoid them:
* **Messy Preliminary Base:** The very first few folds, creating the preliminary base (steps 1-6), are foundational. If these diagonal and horizontal/vertical creases aren’t sharp and precisely aligned, the subsequent folds won’t sit correctly. This can lead to uneven flaps and a wonky final flower.
* *How to avoid it:* Take your time with these initial folds. Align corners and edges perfectly before creasing. Press firmly along the entire length of each crease. If you’re unsure, unfold and re-crease. It’s better to spend a little more time here than to struggle later.
* **Rough Petal Folds:** Step 14 and 15, where you form the petals, can be tricky. Sometimes beginners pull too hard, ripping the paper, or they don’t get a consistent shape for each petal.
* *How to avoid it:* Be gentle and patient. Instead of a sharp, decisive pull, try a more controlled unfolding and shaping. You’re essentially guiding the paper to form the petal. Look at how the crease from step 12 naturally guides the petal fold. Try to keep the pressure even on all four petals. If one petal looks a bit different, that’s okay – nature isn’t perfectly symmetrical!
Varying Your Carambola Flowers
Once you’ve mastered the basic Carambola Flower, the fun really begins with customization!
* **Size:** As I mentioned, using larger or smaller squares of paper will directly affect the size of your finished flower. Experiment! Tiny flowers from 5 cm squares can be used for intricate decorations, while larger ones from 20 cm squares make a statement.
* **Paper Pattern:** This is where your creativity can really shine. Instead of plain colored paper, try patterned origami paper. You could use floral prints for a garden theme, geometric patterns for a modern look, or even paper with subtle textures. The pattern will be visible on the petals, adding another layer of visual interest.
* **Color Combinations:** If you use double-sided paper with different colors on each side, you’ll get fantastic two-toned petals. Imagine a deep red on one side and a soft pink on the other – the subtle shifts in color as the petals open up are gorgeous. You can also try pairing different colored papers for different layers of the flower if you get more advanced and want to combine multiple units.
Displaying and Gifting Your Carambola Flowers
These beautiful origami flowers are perfect for so many things!
* **Garlands and Mobiles:** String several flowers together to create a vibrant garland for a party or a child’s room. You can also attach them to a frame to make a lovely mobile.
* **Gift Toppers:** A single, well-crafted Carambola Flower can be a stunning embellishment for a gift box. Simply attach it with a dab of glue or some double-sided tape.
* **Table Decorations:** Arrange a small bouquet of these flowers in a tiny vase for a unique centerpiece. They’re perfect for weddings, birthdays, or just to brighten up your home.
* **Craft Projects:** Use them as accents on handmade cards, in scrapbooking, or as part of a larger mixed-media art piece.
* **As Gifts:** Of course, the flowers themselves make wonderful gifts. Present a small bunch to a friend, family member, or colleague. They’re a thoughtful and handmade token of appreciation that requires no watering!
I hope you enjoy making your Carambola Flowers. Don’t be discouraged if your first few aren’t perfect; origami is a journey of practice. Happy folding!
Conclusion
Congratulations on folding your very own Carambola Flowers! We hope you enjoyed this origami journey. Remember, every fold is a step, and your first Carambola Flower is simply practice. Don’t be discouraged if it’s not perfect; the beauty of paper crafting lies in the process and the learning. Now that you’ve mastered this delightful model, why not share your beautiful Carambola creations with friends and family? For your next origami adventure, consider trying a smaller version with patterned paper for a unique touch, or perhaps a larger one using cardstock for a more substantial decoration. The world of paper folding is vast and exciting, and we invite you to explore more of our paper projects. Happy folding!