Easy Carmen Sprung Origami Flower Tutorial
Carmen Sprung origami flower tutorials often lead to the creation of a truly stunning paper bloom! Imagine a flower with intricately layered petals, each one delicately curved and unfurling outward, revealing a beautiful, textured center. It’s a design that looks wonderfully complex but is surprisingly achievable.
This project is perfect for those who are ready to move beyond the absolute basics, making it a fantastic step for enthusiastic beginners or older kids looking for a rewarding challenge. You can expect to spend around 20-30 minutes creating your first Carmen Sprung flower, making it ideal for a quick crafting session or as a thoughtful handmade gift. Throughout this tutorial, you’ll learn precise folding techniques to achieve crisp lines and discover how to build depth and dimension in your paper creations. Let’s grab some paper and bring this gorgeous flower to life together!
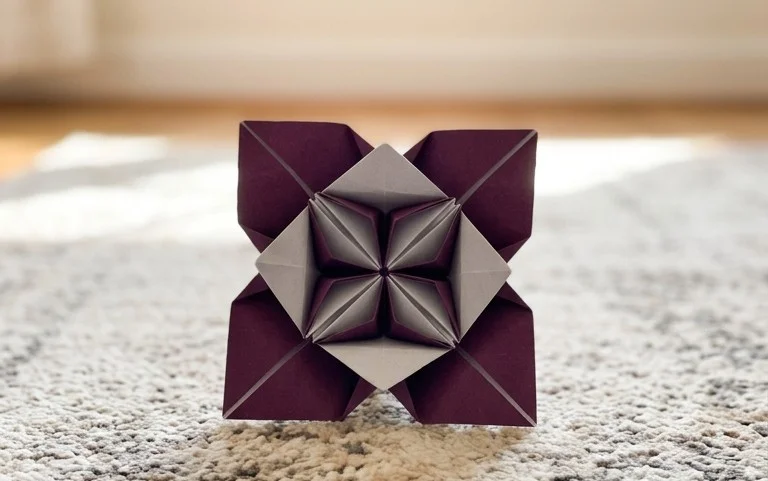
Let’s embark on a delightful origami journey together to create the beautiful Carmen Sprung origami flower! This model is a wonderfully elegant creation that, with a little patience, is entirely achievable for beginners. I remember the first time I saw this flower, I was captivated by its delicate petals and intricate layers. It looks so complex, but I promise, once we break it down step-by-step, you’ll be folding these beauties in no time.
Choosing Your Paper: The Foundation of Your Flower
The right paper is crucial for any origami project, and for the Carmen Sprung flower, it’s no different. We want a paper that holds a crease well, has a pleasing texture, and allows for crisp folds.
Type of Paper
For this model, I highly recommend using standard origami paper. This is a thin, strong paper that’s specifically designed for folding. It’s often dyed throughout, meaning the color is consistent on both sides. You can also use Tant paper, which has a lovely, slightly textured surface and comes in a vast array of vibrant colors. Regular printer paper can be a bit too thick and might make the later stages of folding difficult, especially with multiple layers. If you absolutely must use printer paper, try to find a lighter weight option.
Weight of Paper
Origami paper typically ranges from 60 gsm to 80 gsm. For the Carmen Sprung flower, anything within this range will work beautifully. Lighter paper will make the numerous layers easier to fold, while a slightly heavier paper might give the finished flower a bit more structure and presence. I personally lean towards the 70-80 gsm range for this model as it balances ease of folding with a satisfying sturdiness.
Size of Paper
The size of your starting square will directly determine the size of your finished flower. A common and very manageable size for beginners is a 6-inch (15cm) square. This size allows for precise folding without being too fiddly. If you want a larger, more dramatic flower, you can certainly use 8-inch (20cm) or even 10-inch (25cm) squares. Just be aware that the folds will become progressively more detailed with larger paper. For your first few attempts, stick with the 6-inch squares; they’re perfect for learning the sequence.
Single or Double-Sided Paper
This is where you can really play with the aesthetic of your Carmen Sprung flower! The classic version often uses single-sided paper where one side is colored and the other is white. This creates a beautiful contrast, with the white showing through on the inside of the petals. However, don’t shy away from double-sided origami paper! If you choose two complementary colors, you can create a stunning multi-toned effect. For example, a light pink outside with a deep magenta inside, or a vibrant yellow with a soft peach. Experimentation is key here, and both options yield gorgeous results.
The Base Folds: Building Blocks for Beauty
Before we dive into the specific steps for the Carmen Sprung flower, let’s get familiar with a couple of fundamental folds that form its foundation. Making these folds cleanly and accurately will make the entire process much smoother.
The Preliminary Base (Square Base)
This is a very common base in origami and is essential for many models, including ours.
1. Start with your square piece of paper, colored side up if you’re using single-sided paper.
2. Fold the paper in half horizontally, bringing the top edge down to meet the bottom edge. Crease firmly. Unfold.
3. Fold the paper in half vertically, bringing the left edge over to meet the right edge. Crease firmly. Unfold. You should now have a horizontal and a vertical crease forming a cross in the center of your square.
4. Flip the paper over so the white side is facing up.
5. Fold the paper in half diagonally, bringing the bottom left corner up to meet the top right corner. Crease firmly. Unfold.
6. Fold the paper in half diagonally again, bringing the bottom right corner up to meet the top left corner. Crease firmly. Unfold. You should now have two diagonal creases forming an “X” on this side.
7. Now, bring the left and right edges of the paper inwards, collapsing the paper along the creases you’ve made. The top point will naturally come down to meet the bottom point. You are essentially reversing the horizontal crease and using the diagonal creases to guide the collapse. The result should be a smaller square, with four flaps, often called a “preliminary base” or “square base.” Ensure all the raw edges are neatly aligned at the bottom.
The Bird Base
The bird base is another fundamental origami structure that we will use. It’s built upon the preliminary base.
1. Start with your preliminary base, with the open flaps pointing downwards.
2. Take the top flap on the right side. Fold its outer edge inwards to align perfectly with the center vertical crease. Crease firmly.
3. Repeat this on the left side with the top flap on the left. Fold its outer edge inwards to align with the center vertical crease. Crease firmly. You should now have a kite shape on the top layer.
4. Flip the entire model over.
5. Repeat steps 2 and 3 on this side. Fold the right flap’s outer edge to the center crease, and then the left flap’s outer edge to the center crease. You should have a kite shape on both sides.
6. Now, take the top triangular flap (the point of the kite). Fold it downwards, creasing along the top edge of the two folded flaps you just made. This crease should be horizontal. Crease firmly.
7. Unfold the last fold you just made.
8. Now, carefully lift the bottom point of the top layer upwards. As you lift, use the horizontal crease you just made as a guide. The sides should naturally fold inwards along the existing diagonal creases. This is a “petal fold.” You are opening up the flap and then flattening it into a diamond shape. The two side points of the original kite will now be the top points of this diamond.
9. Flip the entire model over and repeat steps 6-8 on this side. Lift the bottom point of the top layer upwards, using the horizontal crease as a guide, and collapsing the sides inwards to form a diamond shape. You now have the classic bird base. It looks like a diamond with two “legs” at the bottom and two “wings” at the top.
Step-by-Step Folding Sequence for the Carmen Sprung Flower
Now that we’re comfortable with our base folds, let’s start creating the beautiful Carmen Sprung flower! I’ll guide you through each step, assuming you’ve just completed the bird base.
1. You should be looking at the bird base, with the two “legs” pointing downwards. Ensure the smooth, closed point is at the top.
2. Take the right “leg” of the bird base. You’re going to perform another petal fold on this leg. Fold the outer edge of this leg inwards to align with the center vertical crease. Crease firmly.
3. Repeat step 2 with the left “leg.” Fold its outer edge inwards to align with the center vertical crease. Crease firmly. You’ve now narrowed the “legs” into two points on each side.
4. Flip the entire model over.
5. Repeat steps 2 and 3 on this side. Fold the right leg’s outer edge to the center crease, and then the left leg’s outer edge to the center crease. The model should now look quite slim with pointed ends on both the top and bottom.
6. Now, take the rightmost point of the model (which was originally one of the “legs” of the bird base). Fold it upwards, aiming the point towards the top of the model. The exact position of this fold is important for the final shape. You want to fold it up so that the crease line starts about halfway up the side of the model, and the point extends slightly past the top closed point. Don’t worry if this isn’t perfect on your first try; we can adjust later. Crease firmly.
7. Repeat step 6 with the leftmost point of the model. Fold it upwards, mirroring the fold you just made on the right side. Crease firmly.
8. Flip the entire model over.
9. Repeat steps 6 and 7 on this side. Fold the rightmost point upwards, and then the leftmost point upwards, mirroring the folds you made on the other side. You should now have a shape that looks like a diamond with four points sticking up.
10. Take one of the top points. Gently unfold it slightly. We’re going to perform a “reverse fold” here. This is where you tuck a point inside. Open up the layers slightly and push the point inwards and downwards, so it tucks between the layers. The crease you made in step 6 will act as a guide. Try to make the crease clean. This is a bit tricky, so take your time. You are essentially inverting the fold you just made.
11. Repeat step 10 for the other three top points. Gently unfold each point, then carefully reverse fold it inwards and downwards between the layers. This step requires a gentle touch and good lighting.
12. Now, look at the bottom of your model. You should see four flaps. Take one of these flaps and fold it upwards along the body of the flower, creasing it about halfway up.
13. Repeat step 12 for the other three flaps. Fold each one upwards, creasing them to help define the petals.
14. Gently pull apart the four points you just folded upwards. These will become the petals of your flower. As you pull them open, you’ll see the layers of the flower emerge. You can adjust the angle of these petals to your liking.
15. To give the center of the flower some definition, you can gently curl the edges of the petals inwards using your finger or a thin dowel. This adds a lovely finishing touch.
Places Beginners Usually Go Wrong (And How to Avoid Them)
Don’t be discouraged if your first Carmen Sprung flower isn’t perfect. We all started somewhere! Here are a few common pitfalls and how to navigate them:
* **Fuzzy Creases:** This is probably the most common issue. Origami relies on sharp, precise creases. When you make a fold, use your thumbnail or a bone folder to run along the crease firmly. Don’t just press lightly. Ensure the edges of the paper are perfectly aligned before you crease. This is especially important during the base folds.
* **Misjudging the Reverse Fold:** Step 10 and 11, the reverse folds for the points, can be challenging. The key is to make the initial fold (steps 6-9) as accurate as possible. Then, when you open it up, gently guide the point inwards, following the existing crease line. Don’t force it. If it feels like it’s tearing, you’re likely pushing too hard or the initial crease wasn’t quite right. Sometimes, it helps to slightly pre-crease the line where the reverse fold will happen.
* **Uneven Petals:** In step 14, when you pull out the petals, they can sometimes end up at different angles. This is usually because the preceding folds weren’t symmetrical. Try to be as precise as possible in the earlier steps. Once you’ve pulled them out, you can gently adjust them to create a more balanced look. Don’t be afraid to nudge and tweak until you’re happy with the symmetry.
Varying Your Carmen Sprung Flower
Once you’ve mastered the basic Carmen Sprung flower, the fun really begins with customization!
* **Size:** As mentioned earlier, a larger starting square will result in a larger flower, and a smaller square will yield a smaller one. This is a simple way to create a cluster of flowers in varying sizes for a fuller display.
* **Paper Pattern:** This is where you can unleash your creativity! Use patterned origami paper for a unique look. Consider floral patterns for a botanical theme, geometric patterns for a modern twist, or even papers with subtle textures. If you use patterned paper, pay attention to how the pattern will appear on the finished petals.
* **Color:** Don’t be afraid to mix and match! Use different colors for each petal by alternating them when you start the bird base. You can also use gradient papers where the color shifts from one shade to another. This can create a truly mesmerizing effect.
Ideas for Displaying or Gifting Your Finished Model
Your beautiful Carmen Sprung flowers deserve to be showcased!
* **Single Display:** A single, perfectly folded flower can be a stunning statement piece. Place it on a small stand or in a shadow box.
* **Bouquet:** Create a cluster of flowers in various sizes and colors to form a charming origami bouquet. You can arrange them in a small vase or tie them together with ribbon.
* **Garland or Mobile:** String several flowers together to create a beautiful garland for decorating a room or a party. You can also attach them to a mobile for a delicate and whimsical decoration.
* **Embellishments:** Use your flowers to embellish greeting cards, gift tags, or even scrapbooks. They add a handmade and heartfelt touch.
* **Gifting:** An origami flower is a thoughtful and unique gift. It shows you’ve put in time and effort, and it’s a lasting token of your affection. Present it on its own, or tuck it into a card or gift bag.
Folding the Carmen Sprung flower is a rewarding experience. Take your time, enjoy the process, and don’t be afraid to make mistakes – they’re just part of learning! Happy folding!
Conclusion
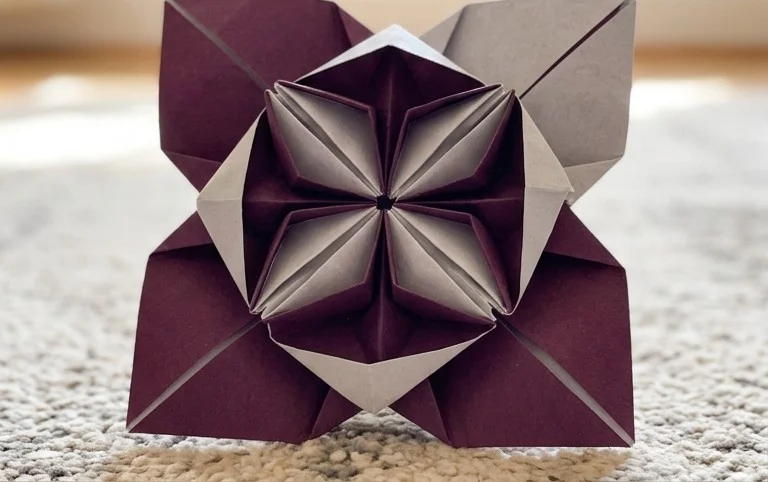
Congratulations on completing your Carmen Sprung origami flower! We hope you found this tutorial enjoyable. Don’t worry if your first attempt isn’t perfect; every fold is a step in the learning process, and practice truly makes your origami creations blossom. We encourage you to try it again and share your beautiful finished model with friends and family!
Next Steps:
Ready for more? Try adding a touch of color by using patterned paper, or experiment with different sizes for a unique bouquet. There are so many wonderful paper projects waiting for you to discover. Happy folding!
