10+ Easy Origami Roses: Step-by-Step Guide + Free Templates
Paper rose tutorials are so much fun, and I’m thrilled you’re here to create some beautiful blooms with me! Imagine a delicate, layered paper rose, its petals unfurling gracefully, ready to adorn a bouquet, a special gift, or simply brighten your space. Whether you’re a complete beginner eager to try a new craft, looking for a sweet activity with kids, or need a heartfelt, handmade gift that takes just a little time (think 30-60 minutes per rose!), these tutorials are perfect for you.
We’ll be diving into over 10 different ways to fold stunning paper roses, all with FREE templates to get you started. You’ll learn the satisfying process of transforming flat paper into elegant three-dimensional flowers, mastering different techniques for unique textures and styles. Let’s get folding and bring some paper beauty into your life!
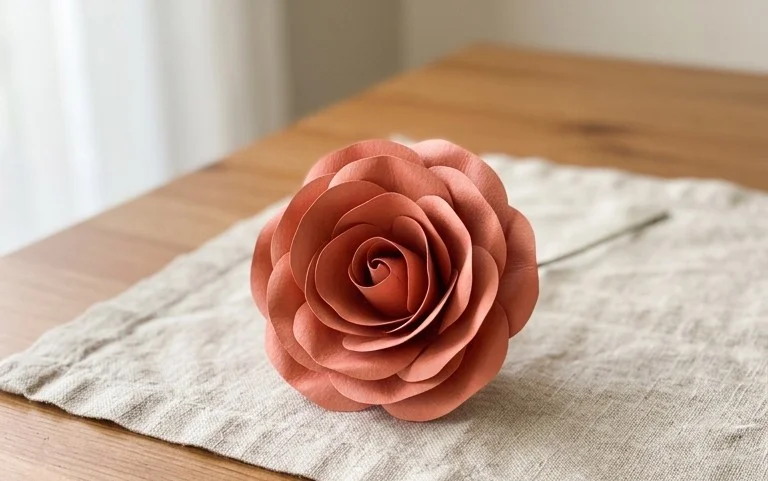
Let’s dive into the wonderful world of origami roses! I remember my first attempt at a paper rose; it was a crumpled mess. But with a little patience and understanding of the basic folds, you’ll be creating stunning blooms in no time. This tutorial will guide you through making over ten different paper roses, many of which require no special patterns – just your paper and a bit of folding magic. We’ll cover everything from choosing the right paper to troubleshooting common mistakes and even how to display your beautiful creations.
Choosing Your Paper for Perfect Roses
The paper you choose is crucial for a beautiful origami rose. It’s not just about color; the weight and type of paper make a significant difference in how your rose will hold its shape and look.
Paper Types and Weights
For most origami roses, especially for beginners, I recommend using standard origami paper. This paper is thin, strong, and holds creases well. It typically comes in square sheets and is usually colored on one side and white on the other, or colored on both sides.
* **Weight:** Origami paper is usually around 70-80 gsm (grams per square meter). This weight is ideal because it’s thin enough to fold many layers without becoming too bulky, but sturdy enough to hold intricate shapes. If you’re using plain printer paper, it’s typically around 80 gsm, which can work, but it’s a bit stiffer and might not produce the same delicate results. Cardstock is generally too thick for most rose designs and can make sharp folds difficult.
* **Size:** Standard origami paper comes in various sizes, with 6-inch (15cm) squares being the most common. For smaller, more intricate roses, you might want to try 3-inch (7.5cm) squares. For larger, statement roses, 8-inch (20cm) or even larger squares can be used. The size of your starting square will directly influence the size of your finished rose.
Single vs. Double-Sided Paper
This is a matter of personal preference and the specific rose design.
* **Single-Sided Paper:** If you’re using paper that’s colored on one side and white on the other, the white side will be visible in the inner parts of the rose, like the core or the underside of petals. This can create a lovely contrast, making the color pop. Many beginner-friendly roses, especially those with simpler petal structures, look beautiful with single-sided paper.
* **Double-Sided Paper:** If you want a consistent color throughout your rose, double-sided origami paper is the way to go. This is particularly effective for more complex designs where the inner folds might be visible. Solid colored papers are excellent for a classic rose look, while patterned papers can create unique and artistic variations.
Mastering the Base Folds
Before we get to the rose-specific folds, let’s ensure you’re comfortable with some fundamental origami techniques. These will make all your folding journeys smoother.
The Valley Fold and Mountain Fold
These are the two most basic folds in origami.
* **Valley Fold:** Imagine you’re making a little valley. You bring two edges or corners together so that the crease forms a “V” shape when viewed from above. The paper folds *towards* you.
* **Mountain Fold:** This is the opposite of a valley fold. You fold the paper so the crease forms an upside-down “V” or an inverted triangle. The paper folds *away* from you.
Making Clean Folds
Clean folds are the secret to a polished origami model.
1. **Align Carefully:** Before making any crease, take the time to precisely align the edges or corners you are bringing together. Even a millimeter off can affect subsequent folds.
2. **Crease Firmly:** Once aligned, use your fingernail or a bone folder (a specialized origami tool) to run along the crease. This ensures the fold is sharp and permanent. Don’t be afraid to apply a little pressure, but be careful not to tear the paper.
3. **Unfold Precisely:** When unfolding, do so carefully, letting the crease guide the paper back. This prevents accidental creases in other areas.
The Preliminary Base (Square Base)**
This is a foundational base for many origami models, including some roses.
1. Start with your square paper, colored side up if you’re using single-sided paper.
2. Fold the paper in half diagonally, bringing the bottom-left corner up to meet the top-right corner. Crease firmly. Unfold.
3. Now fold the paper in half diagonally the other way, bringing the bottom-right corner up to meet the top-left corner. Crease firmly. Unfold. You should now have an “X” crease on your paper.
4. Flip the paper over so the white side is facing you.
5. Fold the paper in half horizontally, bringing the bottom edge up to meet the top edge. Crease firmly. Unfold.
6. Fold the paper in half vertically, bringing the left edge over to meet the right edge. Crease firmly. Unfold. You should now have a “+” crease on this side.
7. Now, gently bring the left and right edges inwards, using the vertical crease. As you do this, the top and bottom edges will naturally start to come together. The diagonal creases you made earlier will guide the paper to collapse into a smaller square. The open points should be at the bottom, and the closed point at the top. This is your Preliminary Base.
### The Waterbomb Base
Another fundamental base often used in rose designs.
1. Start with your square paper, colored side up.
2. Fold the paper in half diagonally, bringing the bottom-left corner to the top-right corner. Crease firmly. Unfold.
3. Fold the paper in half diagonally the other way, bringing the bottom-right corner to the top-left corner. Crease firmly. Unfold. You should have an “X” crease.
4. Flip the paper over to the white side.
5. Fold the paper in half horizontally, bringing the bottom edge to the top edge. Crease firmly. Unfold.
6. Fold the paper in half vertically, bringing the left edge to the right edge. Crease firmly. Unfold. You should have a “+” crease on this side.
7. Now, pinch the left and right sides of the paper where the horizontal crease is. Bring these sides inwards towards the center. As you do this, the top point will naturally come down towards the bottom point. The diagonal creases should help the paper collapse. You should end up with a triangle with multiple layers. This is your Waterbomb Base.
Your First Origami Rose: A Simple Petal Fold
Let’s start with a relatively simple rose that focuses on a beautiful petal formation. This design uses the Preliminary Base.
Step-by-Step Folding Sequence
1. Begin with your square piece of paper, colored side up. Make the Preliminary Base as described above. You should have a square with the closed point at the top and the open flaps at the bottom.
2. Take the top layer of the right flap and fold its bottom edge to meet the center vertical crease. Crease firmly.
3. Repeat step 2 with the top layer of the left flap. Fold its bottom edge to meet the center vertical crease. Crease firmly. You should now have a kite shape on the top layer.
4. Flip the entire model over.
5. Repeat steps 2 and 3 on this side. Fold the bottom edge of the right flap to the center crease, and then the bottom edge of the left flap to the center crease. You will have a kite shape on both sides.
6. Now, unfold the folds you just made in steps 2, 3, and 5. You should see creases forming a smaller diamond shape within the larger square.
7. Take the very top point of the model (the closed point of the Preliminary Base). Fold this point down to meet the bottom point of the kite shapes you just unfolded. Crease firmly.
8. Flip the model over.
9. Fold the top point down again, this time to meet the horizontal line formed by the top edges of the kite shapes you unfolded. Crease firmly.
10. Open up the flap you just folded down. You should see a horizontal crease line.
11. Now, carefully open up the flap you folded down in step 7. Use the creases you’ve made. You want to “petal fold” this section. Lift the bottom point upwards, opening up the layers. The existing creases will guide you. You’re essentially tucking the layers inside to form a new, pointed flap at the top. The sides of this flap should align with the vertical creases. This can be a bit tricky the first time!
12. Flip the model over and repeat step 11 on the other side. This forms the basic pointed petal structure.
13. Now, you have a pointed shape with two flaps on each side. Take one of the side flaps on the top layer. Fold its outer edge towards the center crease. Crease firmly.
14. Repeat step 13 with the other side flap on the top layer.
15. Flip the model over and repeat steps 13 and 14 on this side. You’ve now made the basic petal shape.
16. At the bottom of your model, you’ll see four points. Carefully pull these apart. As you pull them, the petal layers at the top will begin to open and curl. Gently twist the base as you pull the points apart to create the rosebud effect. The more you twist, the more open the rose will become.
Common Beginner Mistakes and How to Avoid Them
Don’t worry if your first few attempts aren’t perfect. Most origami beginners encounter the same few hurdles.
Mistake 1: Sloppy Alignment
* **The Problem:** Not lining up edges and corners precisely before creasing. This leads to skewed shapes and folds that don’t match up later on.
* **How to Avoid:** Be patient! Take your time to align everything perfectly. For critical folds, hold the paper firmly in place with one hand while you make the crease with the other. If you’re finding it hard to hold, try creasing from the center outwards.
Mistake 2: Weak Creases
* **The Problem:** Not creasing firmly enough. This results in a floppy model that doesn’t hold its shape. Folds can also pop open unintentionally.
* **How to Avoid:** Use your fingernail or a bone folder to press down along the entire length of the crease. Ensure the crease is sharp and defined. For thicker paper, you might need to press a bit harder.
Mistake 3: Rushing the Petal Fold (Step 11 & 12)**
* **The Problem:** The petal fold, where you open up the layers to create the pointed petal shape, can be confusing. Beginners often try to force it or don’t use the existing creases to guide them, resulting in crumpled or torn paper.
* **How to Avoid:** Go slowly and trust the creases you’ve already made. Gently pry open the layers along the diagonal creases. Think of it like opening a book, but the “pages” are the paper layers. If it feels like it’s not moving easily, re-examine your previous creases and make sure they are sharp and in the correct position. Sometimes, a very gentle pre-crease along the intended petal fold line can help guide the paper.
Beyond the Basics: More Rose Tutorials!
Once you’ve mastered the simple petal fold, you’ll find there are many other beautiful origami roses to explore. Many of these rely on variations of the bases we’ve discussed or introduce new, simple folding techniques. Here are just a few ideas to look for online (you can search for these terms and find many free diagrams and video tutorials):
* **Kawasaki Rose:** This is arguably the most famous origami rose. It involves a complex twisting and shaping process that results in incredibly realistic petals. It often starts with a circle of paper with specific creases.
* **Modular Roses:** These roses are made by folding several identical units (often called “petals” or “leaves”) and then assembling them together. They can be very striking and allow for color variations within a single bloom.
* **”Easy” Roses:** Many tutorials are designed specifically for beginners and simplify the folding process while still achieving a lovely rose shape. Look for terms like “easy origami rose,” “beginner origami rose,” or “no diagram origami rose.” These often involve fewer steps and more forgiving folds.
* **Roses with Leaves and Stems:** Once you’re comfortable with the rose itself, you can branch out to folding accompanying leaves and stems to create a complete bouquet. These are often made from green paper.
Varying Your Origami Roses
The beauty of origami is its versatility! You can create endless variations of your paper roses.
Size Matters
As mentioned earlier, the size of your starting square paper dictates the size of your finished rose.
* **Small Blooms:** Use 3-inch (7.5cm) squares for delicate boutonnieres or to add to garlands.
* **Medium Blooms:** 6-inch (15cm) squares are perfect for general crafting, bouquets, or table decorations.
* **Large Blooms:** 8-inch (20cm) or larger squares create impressive statement pieces for displays or as single focal points.
Paper Patterns and Colors
This is where your creativity truly shines!
* **Classic Red/Pink:** For a traditional rose look, use solid red, pink, or burgundy paper.
* **Ombre and Gradient Papers:** These papers have a gradual color change, which can create a stunning effect of depth and natural color variation in the petals.
* **Textured Papers:** Some origami papers have a slight texture, which can add a touch of elegance.
* **Patterned Papers:** Floral patterns, geometric designs, or even subtle marbled papers can lead to unique and artistic roses. Consider how the pattern will look when folded into petals.
* **Two-Tone Effects:** Use double-sided paper with contrasting colors on each side for an interesting effect. For example, red on one side and green on the other can give a subtle hint of green within the petals.
Displaying and Gifting Your Handmade Roses
Your beautiful origami roses deserve to be showcased!
* **Bouquets:** Gather several roses together to create a stunning, everlasting bouquet. You can mix different sizes and colors for a dynamic arrangement. Add folded leaves and stems for a realistic touch.
* **Table Decorations:** Place individual roses or small arrangements on tables for parties, weddings, or just to brighten up your home.
* **Gift Toppers:** An origami rose is a much more personal and memorable way to top a gift than a standard bow.
* **Craft Projects:** Incorporate them into scrapbooking, card-making, or even creating decorative wall art.
* **Party Favors:** Small, single roses can make lovely favors for guests at events.
* **Home Decor:** Place them in a decorative vase on a shelf or windowsill. They require no watering and will last forever!
I hope this detailed guide empowers you to start folding your own beautiful paper roses. Remember to be patient, enjoy the process, and don’t be afraid to experiment. Happy folding!
Conclusion
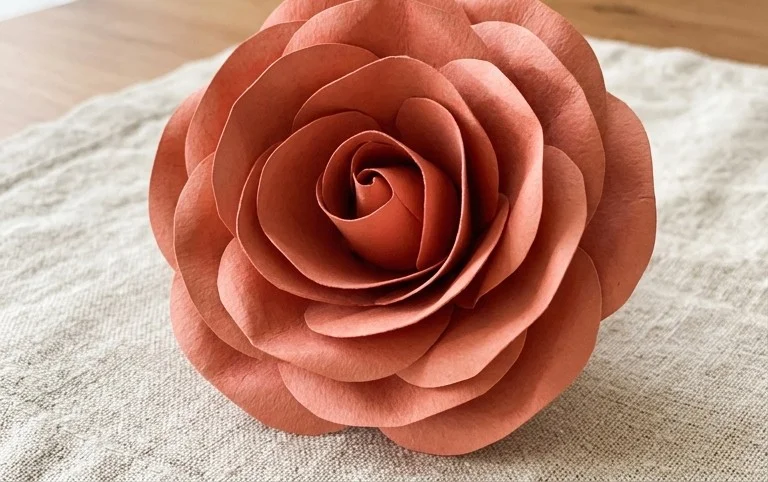
Congratulations on completing your paper rose! We hope you enjoyed this step-by-step journey and are delighted with your beautiful creation. Remember, your first paper rose is a learning experience, so don’t be discouraged if it’s not perfect. Keep practicing, and you’ll be amazed at how quickly your skills blossom!
Once you’ve mastered this design, why not try a slightly more intricate rose or perhaps a different flower like a tulip or a lily? We encourage you to share your gorgeous paper rose creations with friends and family – they make wonderful handmade gifts! There are so many more delightful paper projects waiting for you to explore, so keep folding and let your creativity flourish!