Easy Braided Pipe Cleaner Bracelets: Step-by-Step Craft
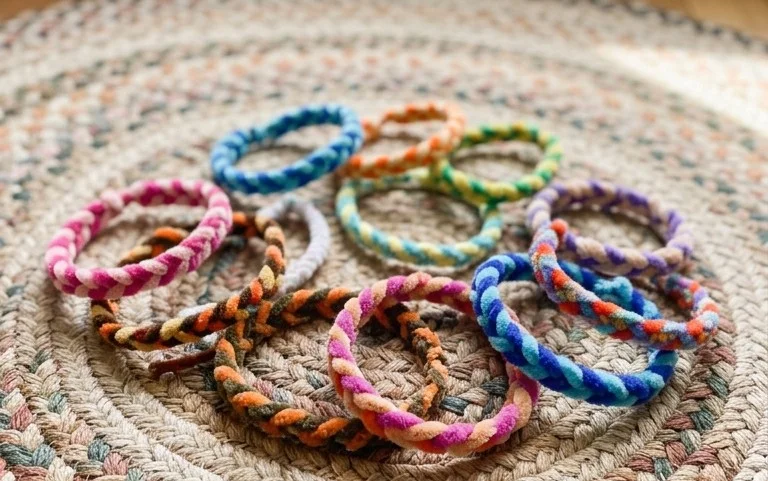
Braided pipe cleaner bracelets are a fantastic and colorful way to get creative with simple materials! Imagine a beautifully woven band of vibrant pipe cleaners, twisting and turning to form a sturdy, yet flexible bracelet that looks like a miniature, playful braid. These are perfect for complete beginners of all ages, especially kids looking for a fun and quick craft. You can whip up a stack of these in under 10 minutes each, making them ideal for party favors, handmade gifts, or just adding a pop of color to your own wrist.
In this tutorial, we’ll guide you step-by-step through the easy technique of braiding, showing you how to transform simple pipe cleaners into these delightful accessories. Get ready to get your hands busy and create something truly special!
Crafting Your Own Braided Pipe Cleaner Bracelets: A Step-by-Step Origami Journey
Hello crafters! Today, we’re embarking on a fun and accessible origami project: braided pipe cleaner bracelets. These aren’t made from traditional paper, but from something even more flexible and forgiving – pipe cleaners! This project is fantastic for all ages, from young children learning their first folds to adults looking for a satisfyingly tactile craft. It’s a wonderful way to create personalized gifts or simply adorn your own wrist with something handmade.
Choosing Your “Paper”: The Magic of Pipe Cleaners
Now, when I say “origami,” you might immediately picture delicate paper squares. But for this project, we’re using pipe cleaners, which are essentially fuzzy wire. This gives us a lot of freedom and makes the process quite forgiving.
* **Type of Pipe Cleaner:** You’ll want standard craft pipe cleaners. They’re readily available in craft stores and come in a vast array of colours. You can find them in different textures too – fuzzy, metallic, even glittery! For this bracelet, the standard fuzzy ones work best for a good grip and a nice braided texture.
* **Weight and Size:** Standard pipe cleaners are usually around 12 inches long and a quarter-inch thick. This size is perfect for a comfortable bracelet. You’ll typically need three pipe cleaners to make one bracelet, but we’ll get to that in the folding steps.
* **Single or Double Sided:** Unlike paper origami where you might worry about whether your paper has a coloured side and a white side, pipe cleaners are generally the same colour all the way through. This simplifies things immensely! You don’t need to worry about which side is facing up.
The Base Folds: Simple, Yet Essential
The beauty of this project lies in its simplicity. We’re not dealing with complex mountain or valley folds as you might find in traditional paper origami. Instead, the “folds” here are more about bending and securing the pipe cleaners.
The fundamental “fold” or manipulation we’ll be doing is essentially **bending a pipe cleaner in half**. This creates a center point, which is crucial for our braiding technique. We’ll also be doing a lot of **twisting** and **weaving**, which are the core mechanics of creating the braided look.
The key to making these “folds” clean is **firmness and precision**. When you bend a pipe cleaner, try to make a crisp crease. This will help your bracelet look neat and tidy. Similarly, when you twist, twist firmly but not so hard that you risk breaking the wire inside.
Your Step-by-Step Braiding Adventure
Let’s get started! You’ll need three pipe cleaners for each bracelet. I recommend picking colours that complement each other.
1. **Prepare Your Pipe Cleaners:** Take your three chosen pipe cleaners. Lay them out side-by-side.
2. **The Initial Bend:** Take your first pipe cleaner. Find the exact middle point. Bend it sharply in half. You now have a U-shape. Do the same for the second and third pipe cleaners.
3. **Joining Them Together:** Now, take the three bent pipe cleaners. Hold the curved ends (the U-shapes) together in one hand. You should have three loops, with the straight ends pointing away from you.
4. **The First Twist:** Take the three straight ends together. Twist them around each other a few times, about an inch or so down from where the loops meet. This secures the loops together and forms the starting point of your braid. Imagine you’re twisting three strands of yarn together. This initial twist is like the start of a rope.
5. **The Braiding Begins:** You should now have three distinct “strands” extending from the twisted section. Let’s call them Left, Middle, and Right for clarity.
6. **Moving the Left Strand:** Take the pipe cleaner on the far left. Cross it over the Middle pipe cleaner, so it becomes the new Middle pipe cleaner.
7. **Moving the Right Strand:** Now, take the pipe cleaner that is now on the far right. Cross it over the new Middle pipe cleaner, so it becomes the new Middle pipe cleaner.
8. **Repeat the Pattern:** You’re essentially creating a three-strand braid. The pattern is: Left over Middle, then Right over Middle. Continue this sequence:
* Take the current Left strand and move it to the Middle position.
* Take the current Right strand and move it to the Middle position.
* Repeat this over and over.
9. **Keep it Tidy:** As you braid, gently pull on the strands to keep the braid snug and even. This is important for a professional-looking finish.
10. **Continue Braiding:** Keep braiding until your bracelet is the desired length to fit around your wrist. Remember to account for the space you’ll need to close it off.
11. **Securing the End:** Once you have a good length, you’ll need to secure the end. Take the three loose ends and twist them together firmly, just as you did at the beginning. You can twist them a good inch or two to make sure they are secure and won’t unravel.
12. **Forming the Bracelet:** Now you have a long braided section with a twisted start and a twisted end. Carefully bring the two twisted ends together to form a circle.
13. **Joining the Ends:** Interlock the twisted ends by weaving them into each other. You might need to gently separate some of the twists in each end to create space for the other end to weave in. Twist them together again to secure the bracelet shape. You can also tuck any stray ends in neatly.
Common Pitfalls and How to Avoid Them
Even with forgiving pipe cleaners, there are a couple of spots where beginners often stumble. Don’t worry if you encounter these – it’s all part of the learning process!
* **Uneven Twisting:** Sometimes, the initial twist where you join the pipe cleaners can be too loose or too tight. If it’s too loose, the bracelet might feel flimsy. If it’s too tight, it can be hard to start braiding smoothly.
* **To Avoid:** When you do that first twist, hold all three pipe cleaners firmly and twist them together with consistent pressure. Aim for a twist that is snug but still allows you to easily separate the strands for braiding. You can always adjust by adding a few more twists if needed.
* **Tension Differences During Braiding:** As you braid, it’s easy for one strand to become tighter or looser than the others. This can lead to a lopsided bracelet.
* **To Avoid:** This is where gentle, consistent pulling comes in. After each “over and under” movement, give each of the three working strands a little tug to bring them into line with the others. Imagine you’re trying to make the braid as uniform as possible throughout. It takes a little practice to get a feel for the right tension.
* **Fiddly End Securing:** Trying to get the two twisted ends to join neatly can sometimes be a bit challenging.
* **To Avoid:** Don’t be afraid to “unwind” a little bit of the twists on each end to create more flexibility. You want to be able to interlock them securely. Once they are interlocked, twist them together again firmly. You can even wrap some of the excess length around the join to make it even sturdier and neater.
Varying Your Creations: Unleash Your Inner Designer!
The beauty of this project is how easily you can customize it.
* **Size:** To make a bracelet larger or smaller, simply adjust the length you braid. For children, you might need fewer folds. For a larger wrist or even an ankle bracelet, you’ll braid for longer.
* **Paper Pattern (or Pipe Cleaner Colour!):** This is where the fun really begins!
* **Colour Combinations:** Experiment with different colour pairings. Try rainbow effects by using three different bright colours, or go for a more subdued look with metallics or pastels. You can even use two of one colour and one of another for a different visual impact.
* **Striped Pipe Cleaners:** Some craft stores sell pipe cleaners with stripes, which can create a really interesting effect in your braid.
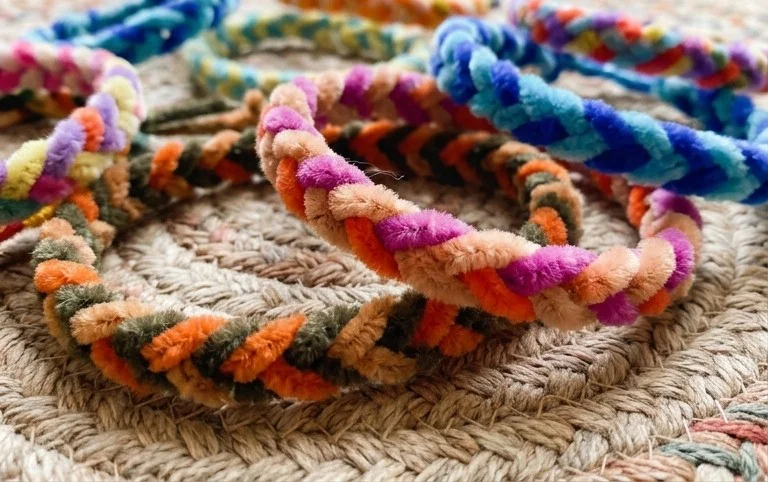
* **Different Textures:** Try mixing fuzzy pipe cleaners with metallic ones for a textured contrast.
* **Adding Embellishments:** Once your bracelet is complete, you can add beads! Thread beads onto the pipe cleaners before you start braiding, or carefully slide them onto the finished bracelet and secure them by twisting the pipe cleaner around the bead.
Displaying and Gifting Your Masterpieces
Your handmade braided pipe cleaner bracelets are not just accessories; they’re little works of art!
* **Gift Packaging:** These make fantastic, thoughtful gifts. You can:
* **String them onto a small card:** Punch a couple of holes in a card and thread the bracelet through. This looks very professional.
* **Place them in a small organza bag:** This adds a touch of sparkle and makes the gift feel extra special.
* **Tie them with ribbon:** Simply tie a nice ribbon around the bracelet.
* **Display:** If you’re making a collection for yourself, you can:
* **Use a bracelet holder:** A simple stand or bowl works wonderfully.
* **Arrange them on a shelf:** Group them by colour or style.
* **Wear them stacked:** They look great layered on a single wrist!
I hope you’ve enjoyed this journey into creating braided pipe cleaner bracelets! It’s a simple yet rewarding craft that allows for so much creativity. Happy crafting!
Conclusion
Congratulations on completing your very own braided pipe cleaner bracelets! We hope you enjoyed this fun and colorful craft. Don’t worry if your first attempt isn’t perfect; that’s just part of the learning process. Keep practicing, and you’ll soon be creating even more intricate designs. We’d love to see your finished masterpieces! Consider sharing them with friends or family to spread the joy of handmade gifts. For your next crafting adventure, try making braided pipe cleaner headbands or even small braided pipe cleaner animals. And if you’re ready for a new challenge, don’t hesitate to explore our other exciting paper projects!
